  _________________________________________________________
 (_O__O__O__O__O__O__O__O__MECCANO__O__O__O__O__O__O__O__O_)
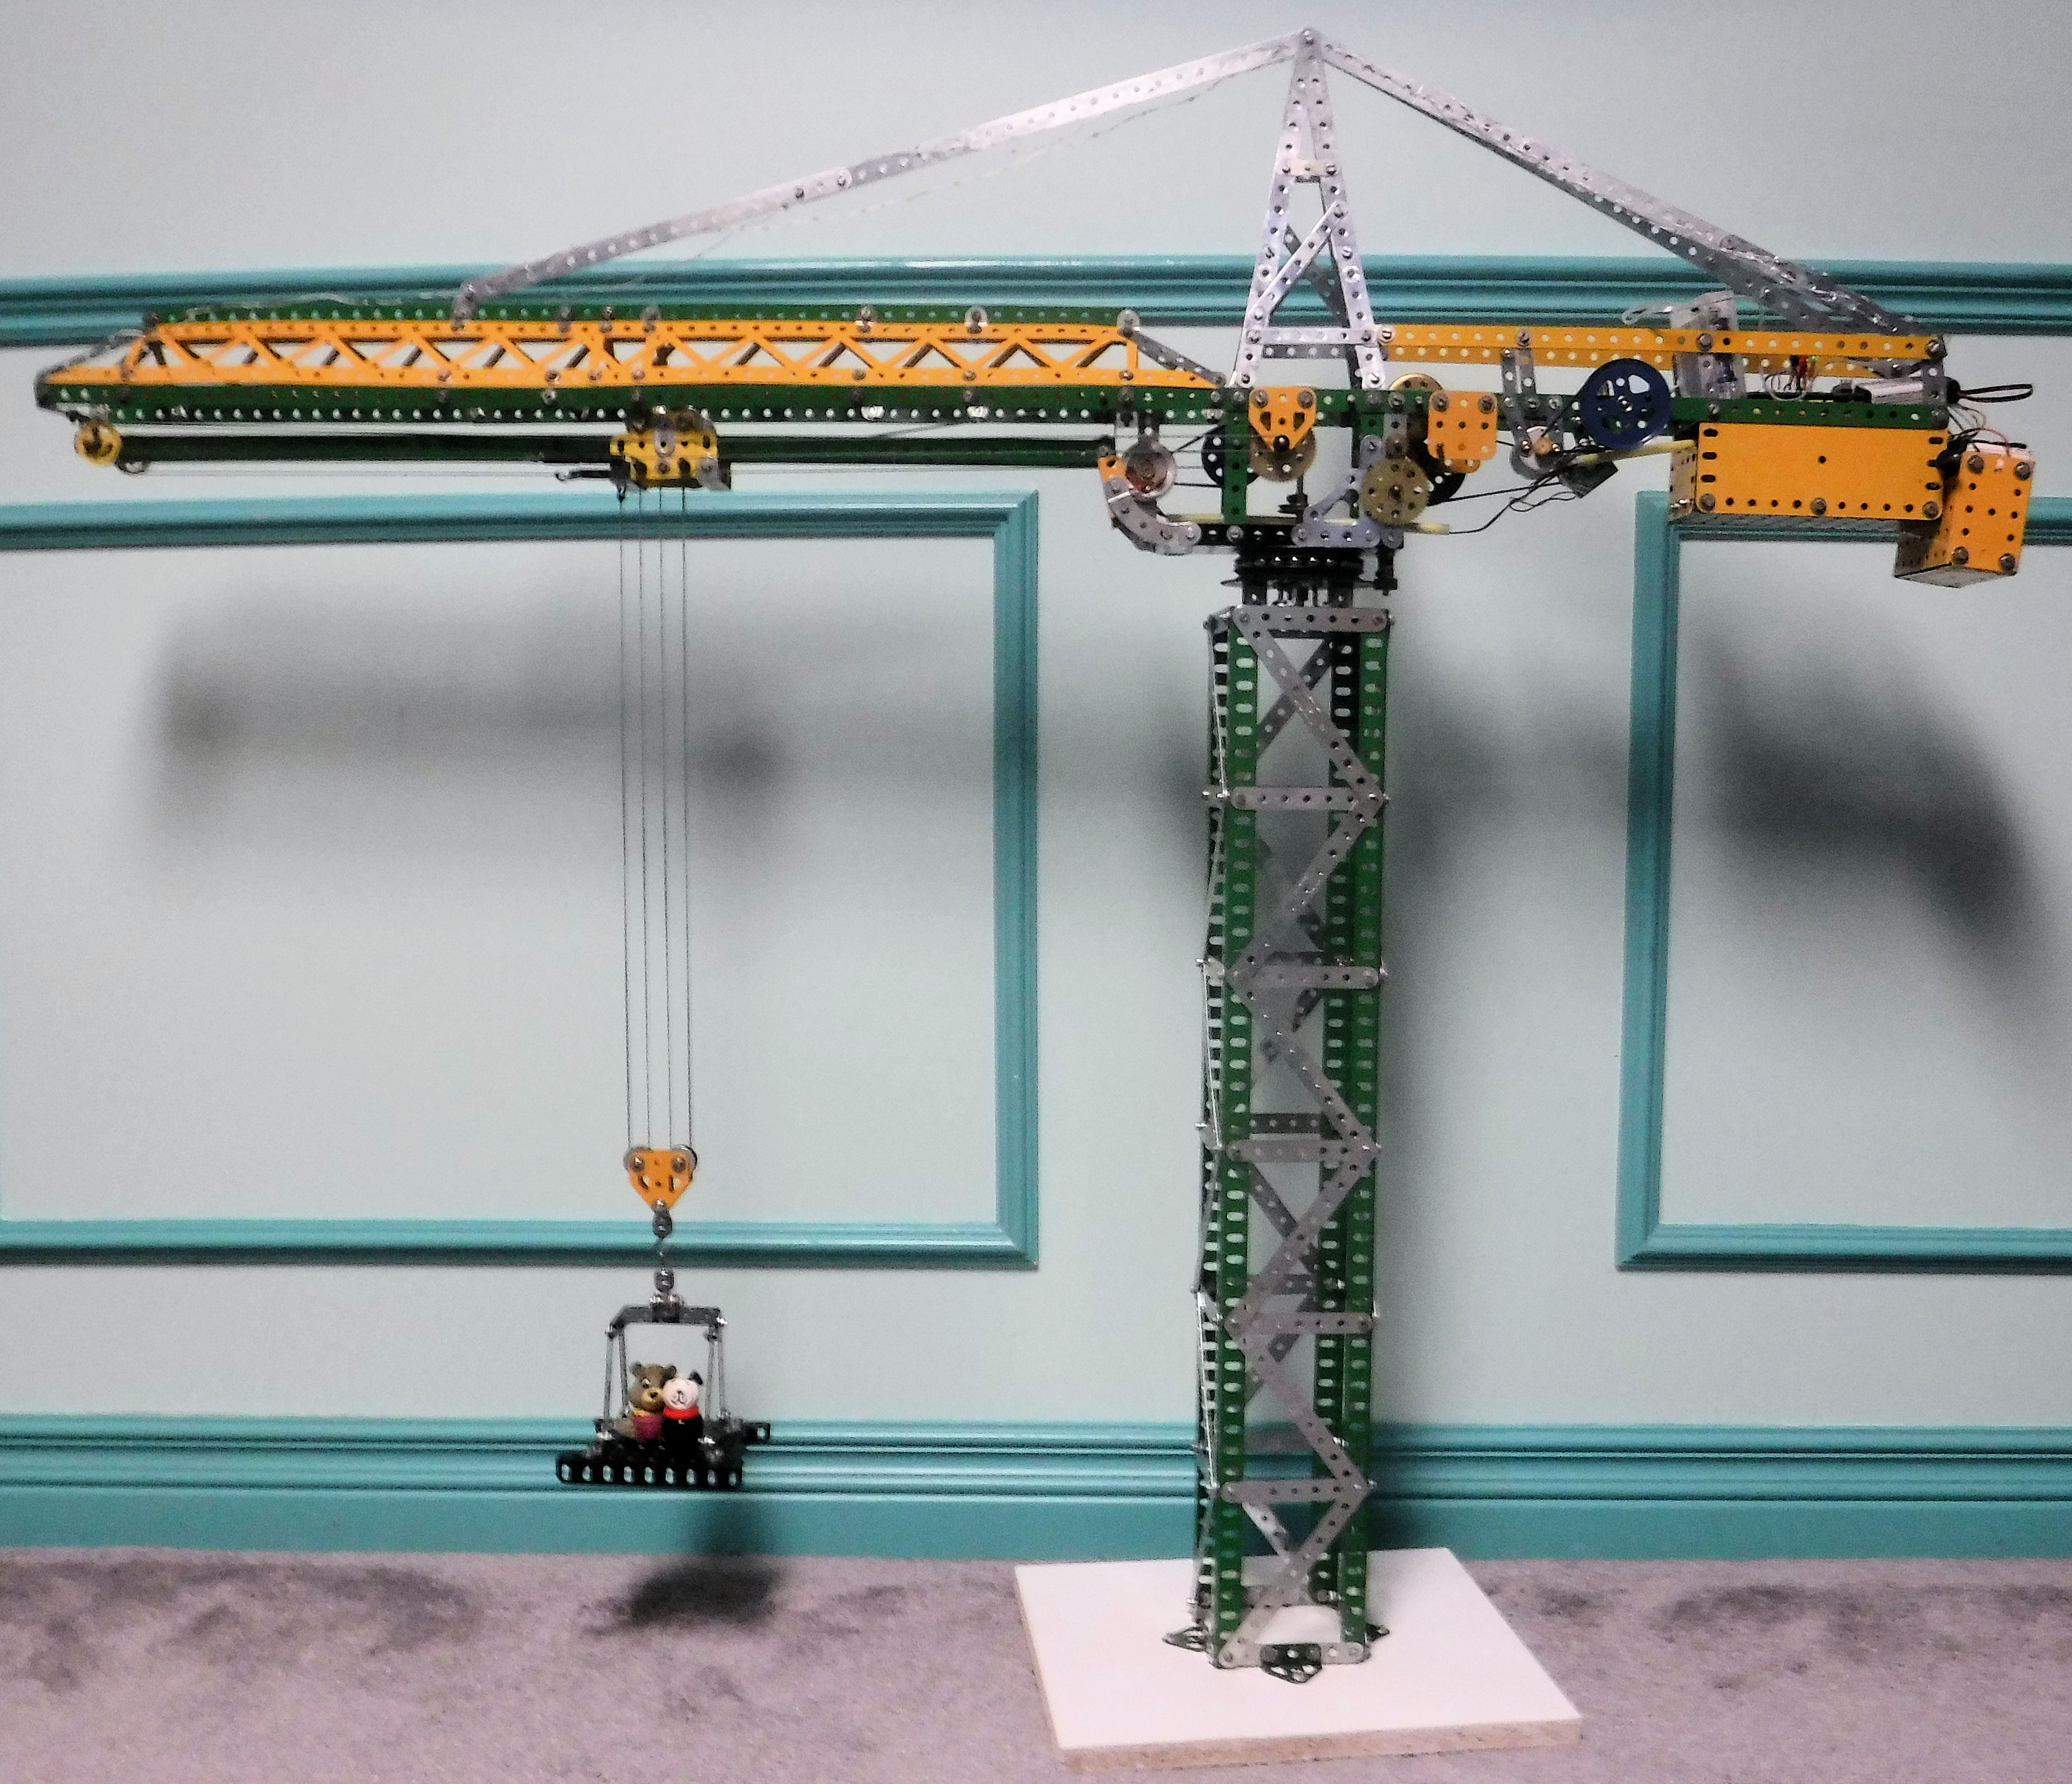
These are photos and notes for my Arduino computer controlled Meccano Tower Crane. It is battery powered and is operated with an IR remote control.
Overall, the tower crane is 38" tall with a 45" long jib. The Trolley runs on a pair of 24 1/2" Strips to ensure smooth movement.
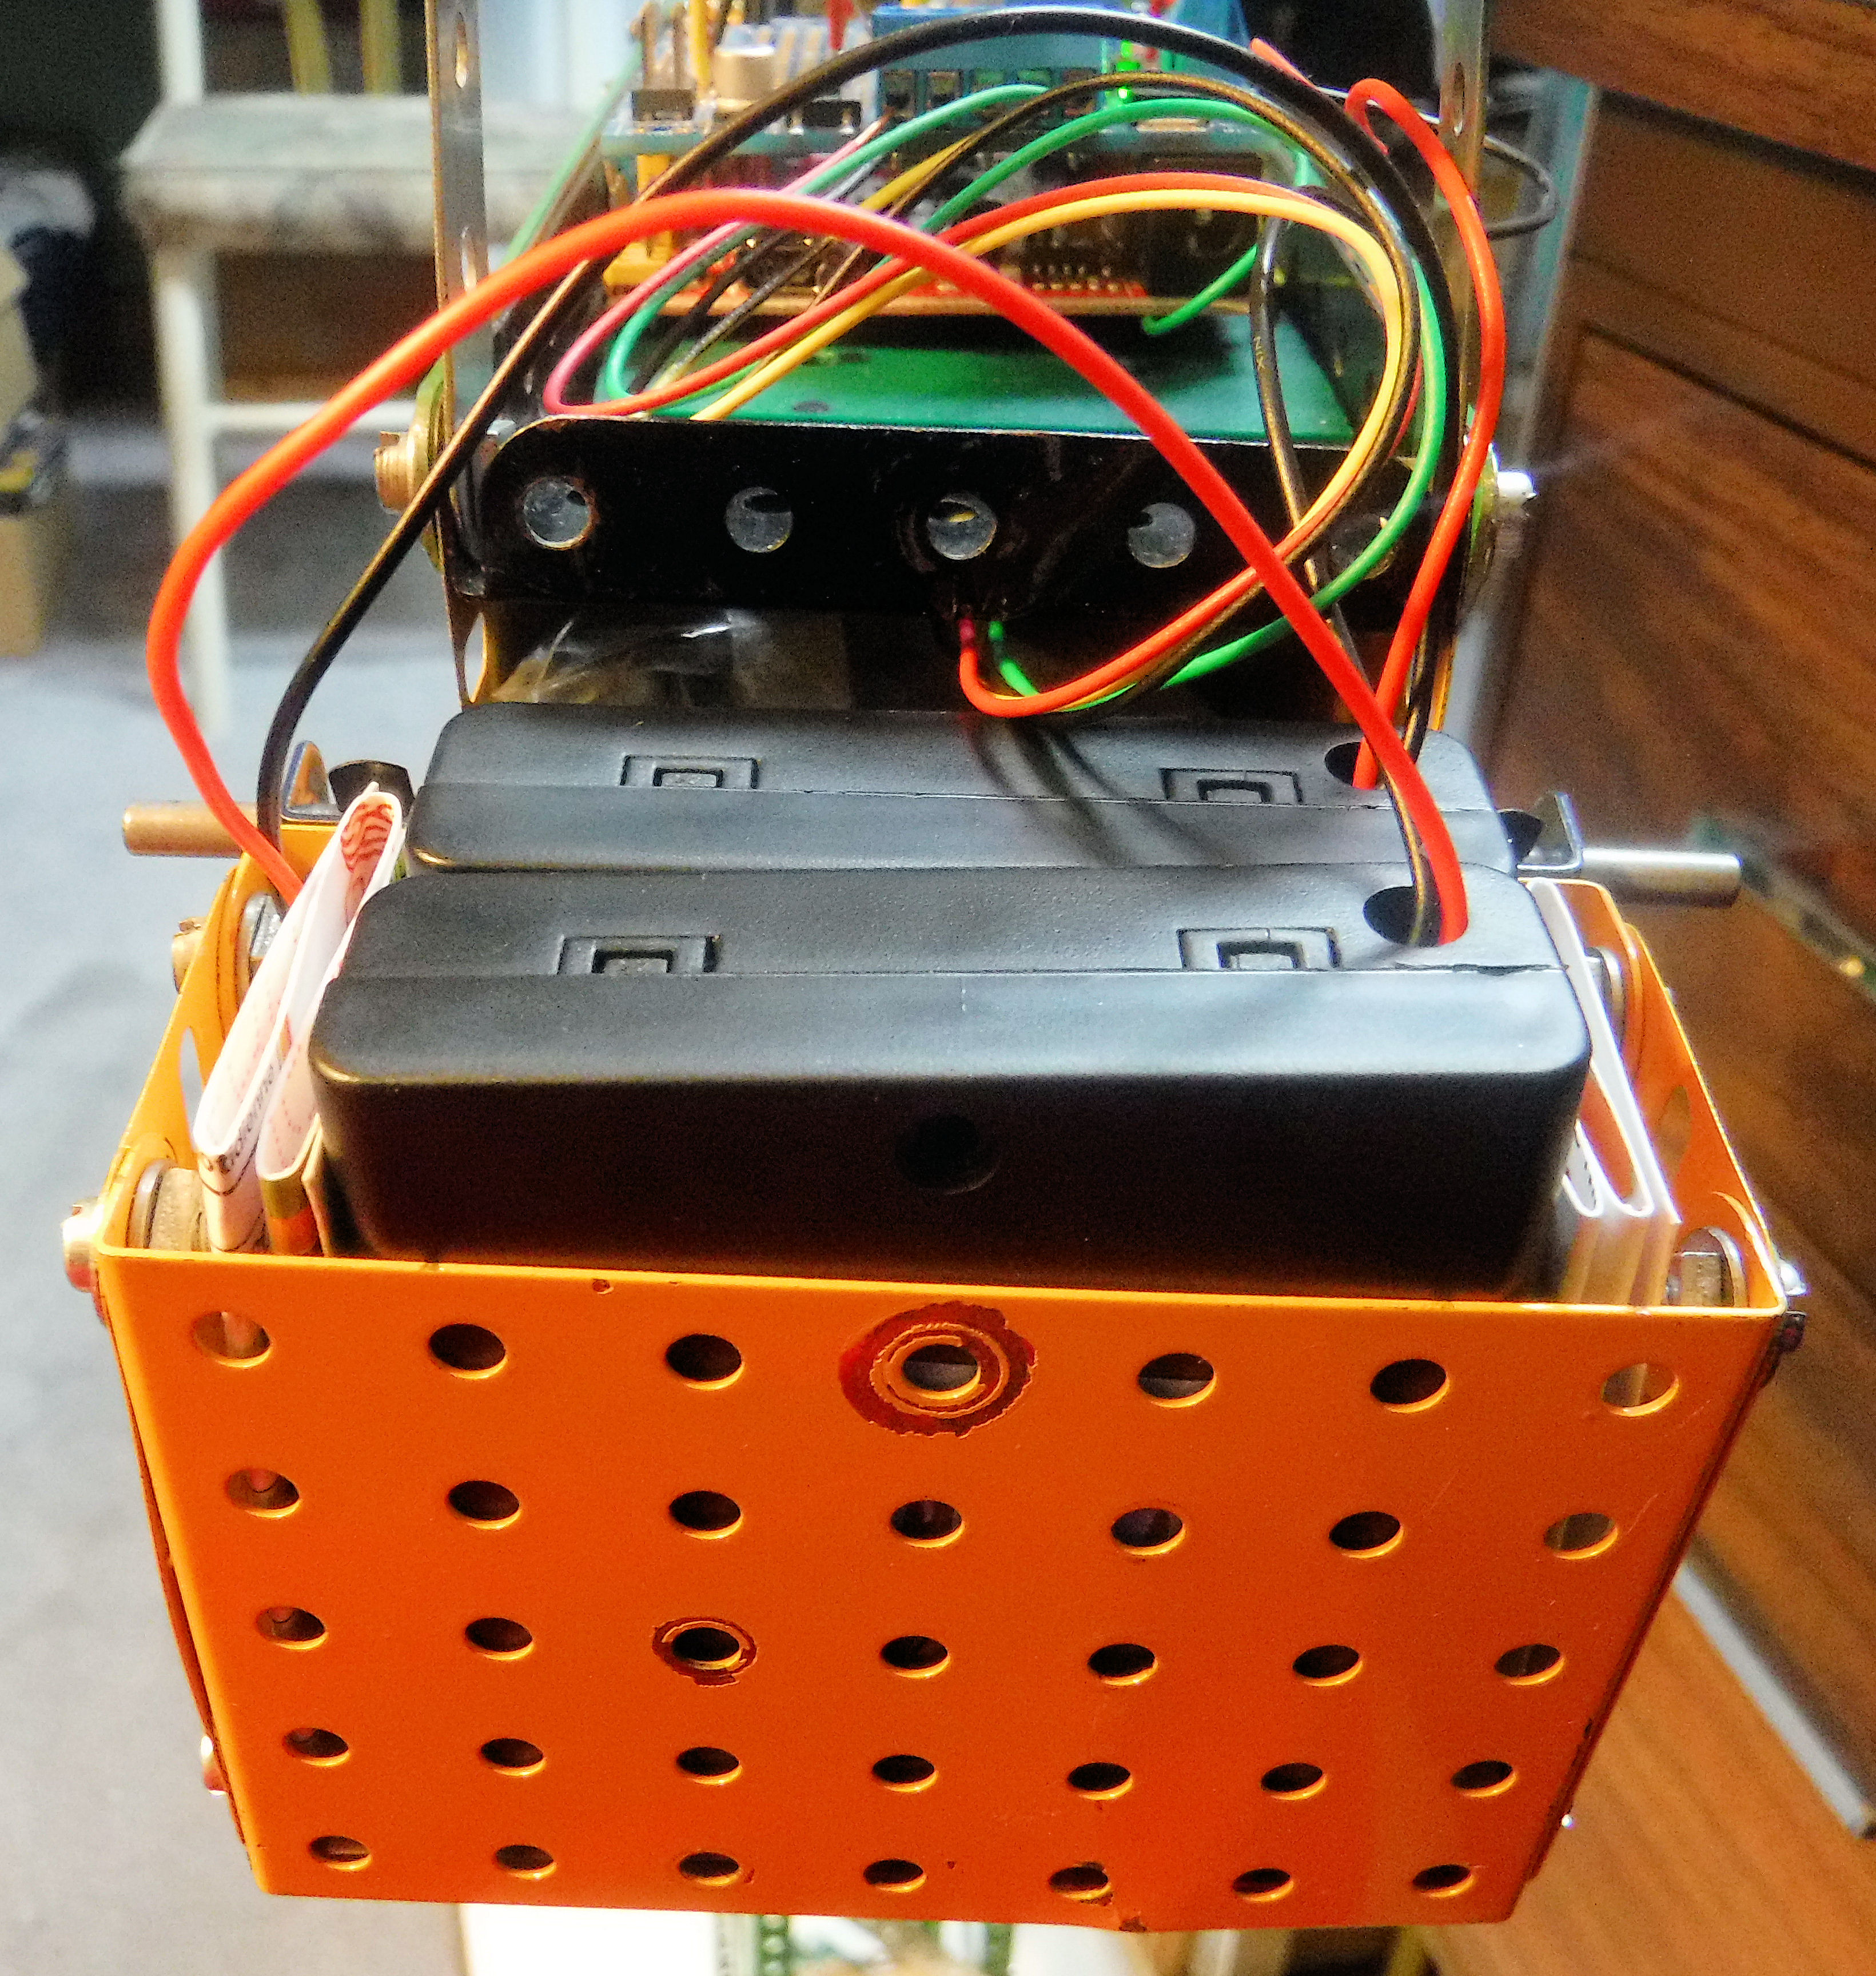
Holds two 4xAA battery boxes with rechargeable batteries wired in serial.
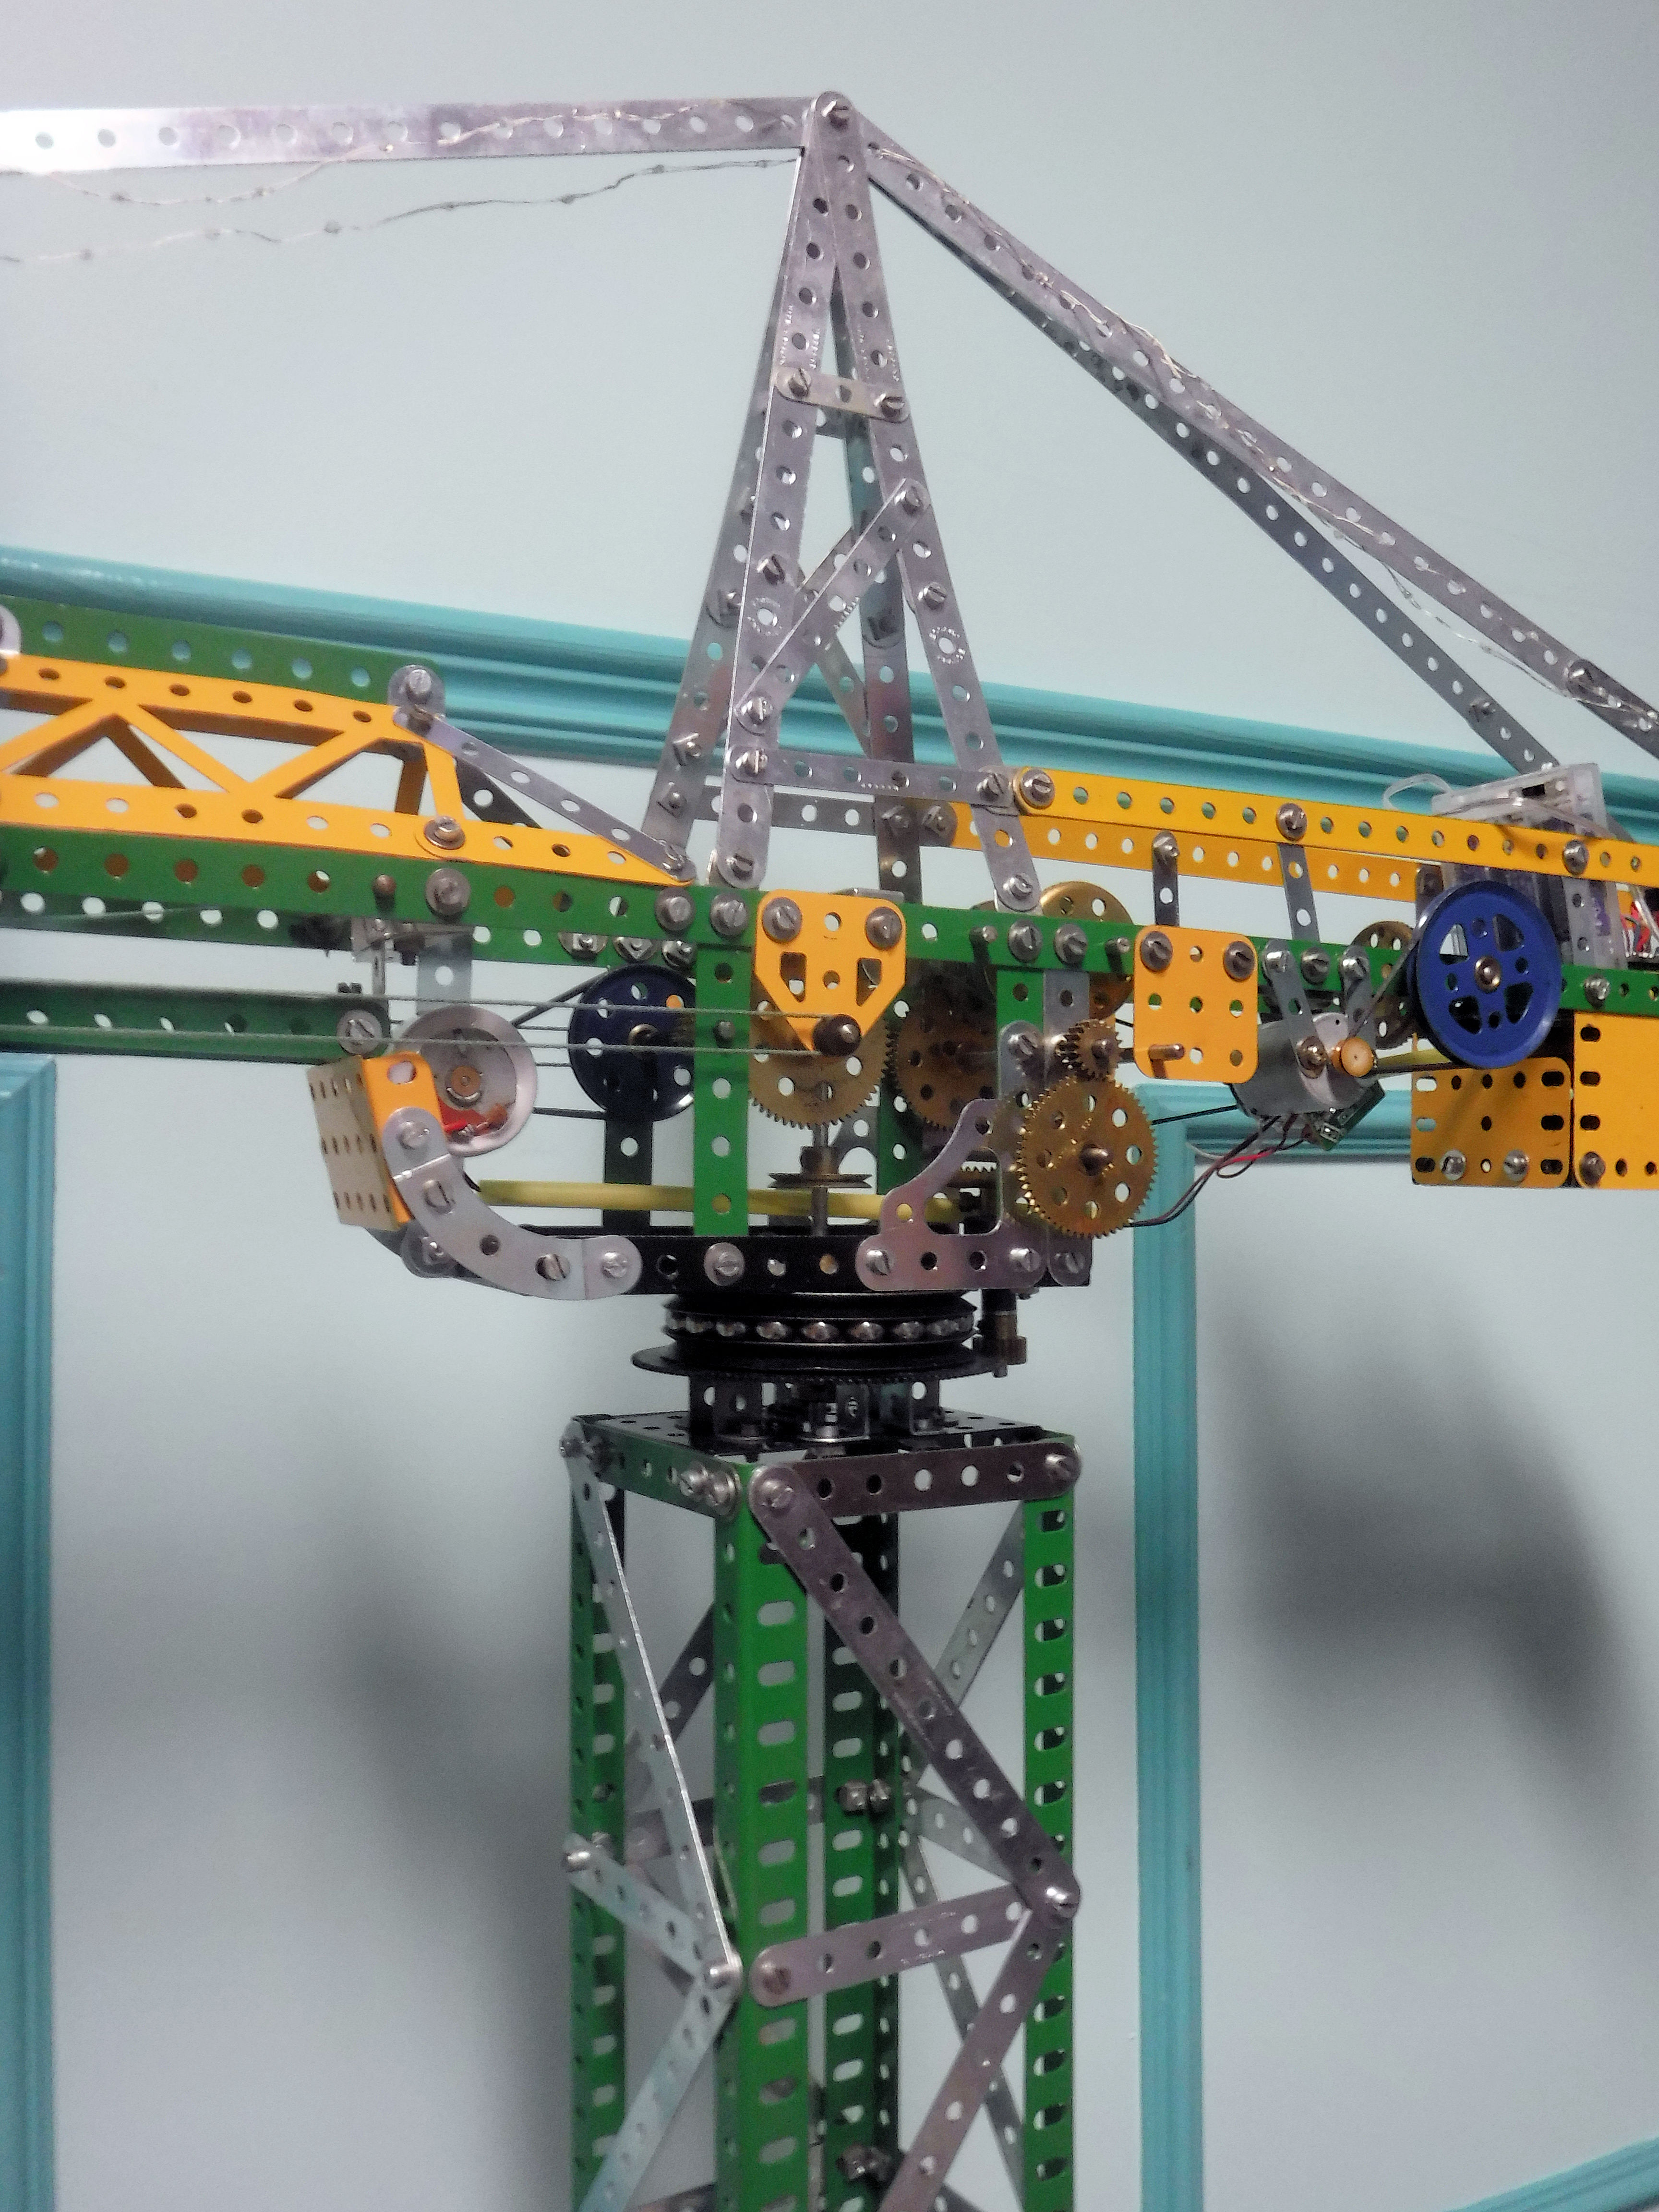
The tower is constructed with four 24 1/2" Angle Girders braced with 5 1/2" and 3 1/2" Strips; on the top of the tower we have a 5 1/2 x 3 1/2" Flanged Plate, four Double Angle Strips, a 3 1/2" Gear Wheel, two 3" Pulleys separated by a Wheel Flange and twenty 10mm Ball Bearings.
The top 3" Pulley is bolted to a 5 1/2 x 2 1/2" Flanged Plate which supports the jib.
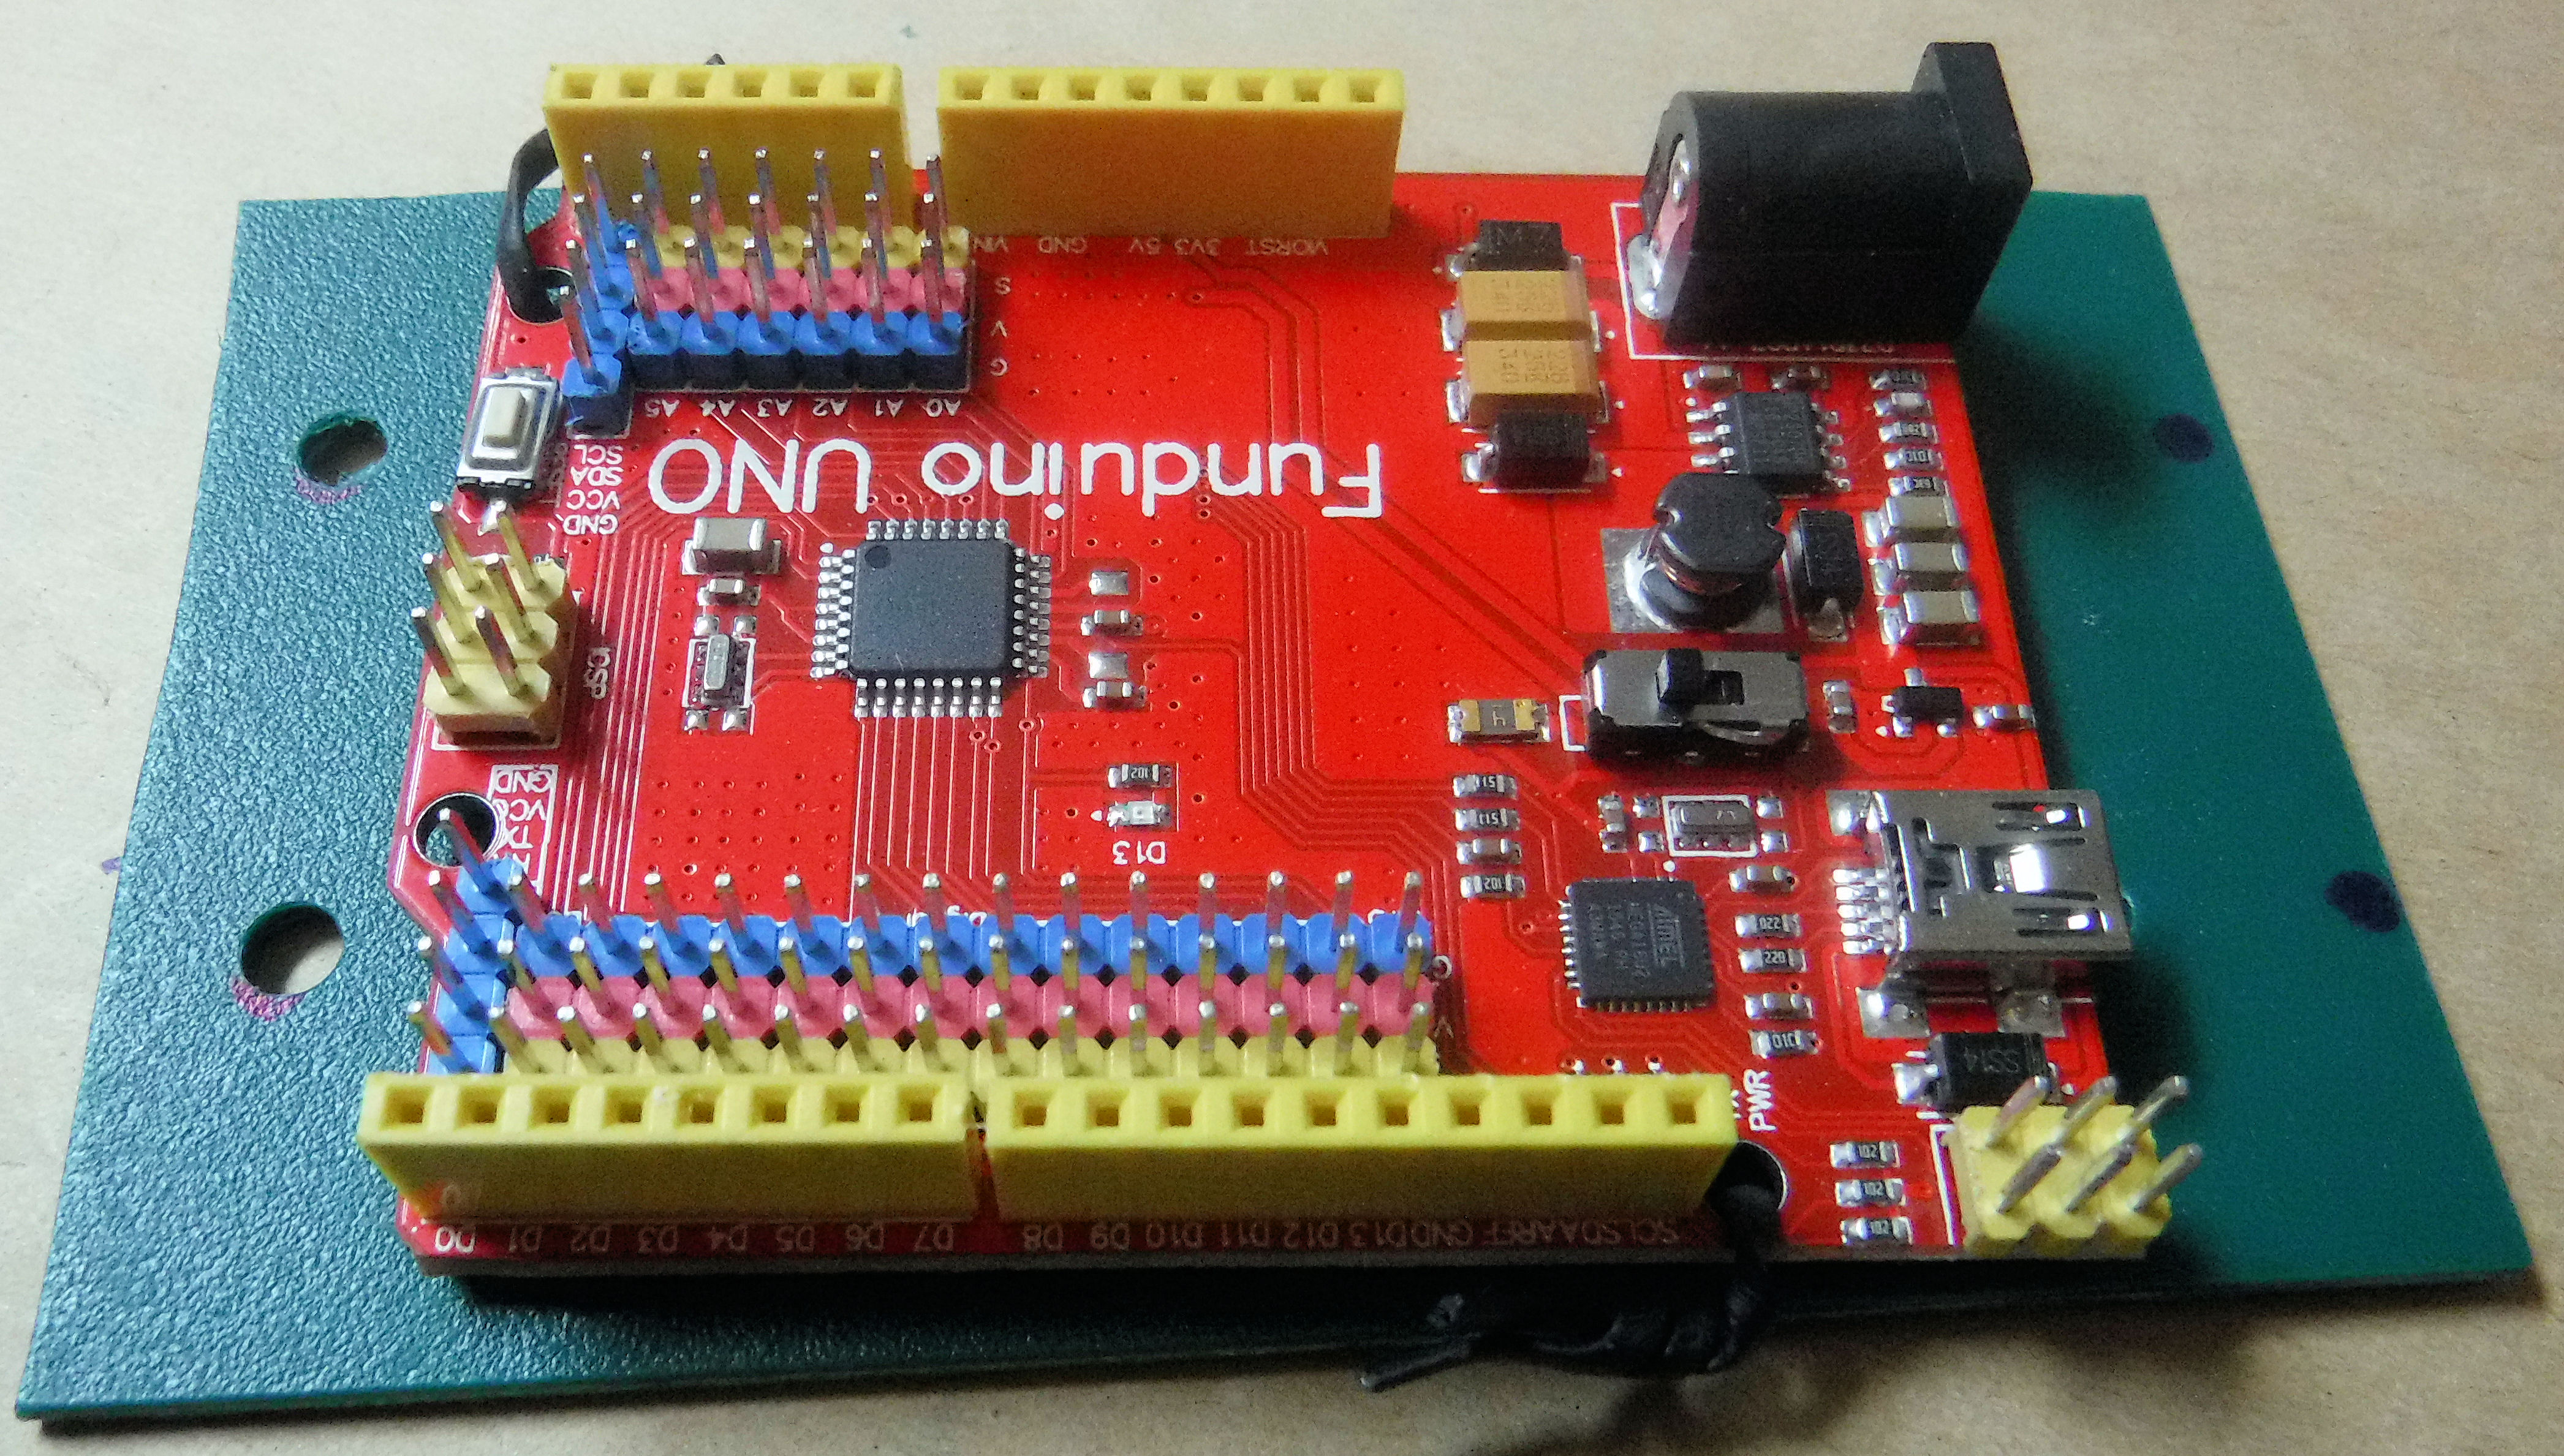
Funduino Uno (Arduino Uno Clone) but with Mini USB; it is twist tied to a small sheet of plastic that is bolted to the 5 1/2 x 2 1/2" Flanged Plate that forms the top of the counterweight; this insulates it from any static electricity that might be transmitted by the Meccano metal frame.
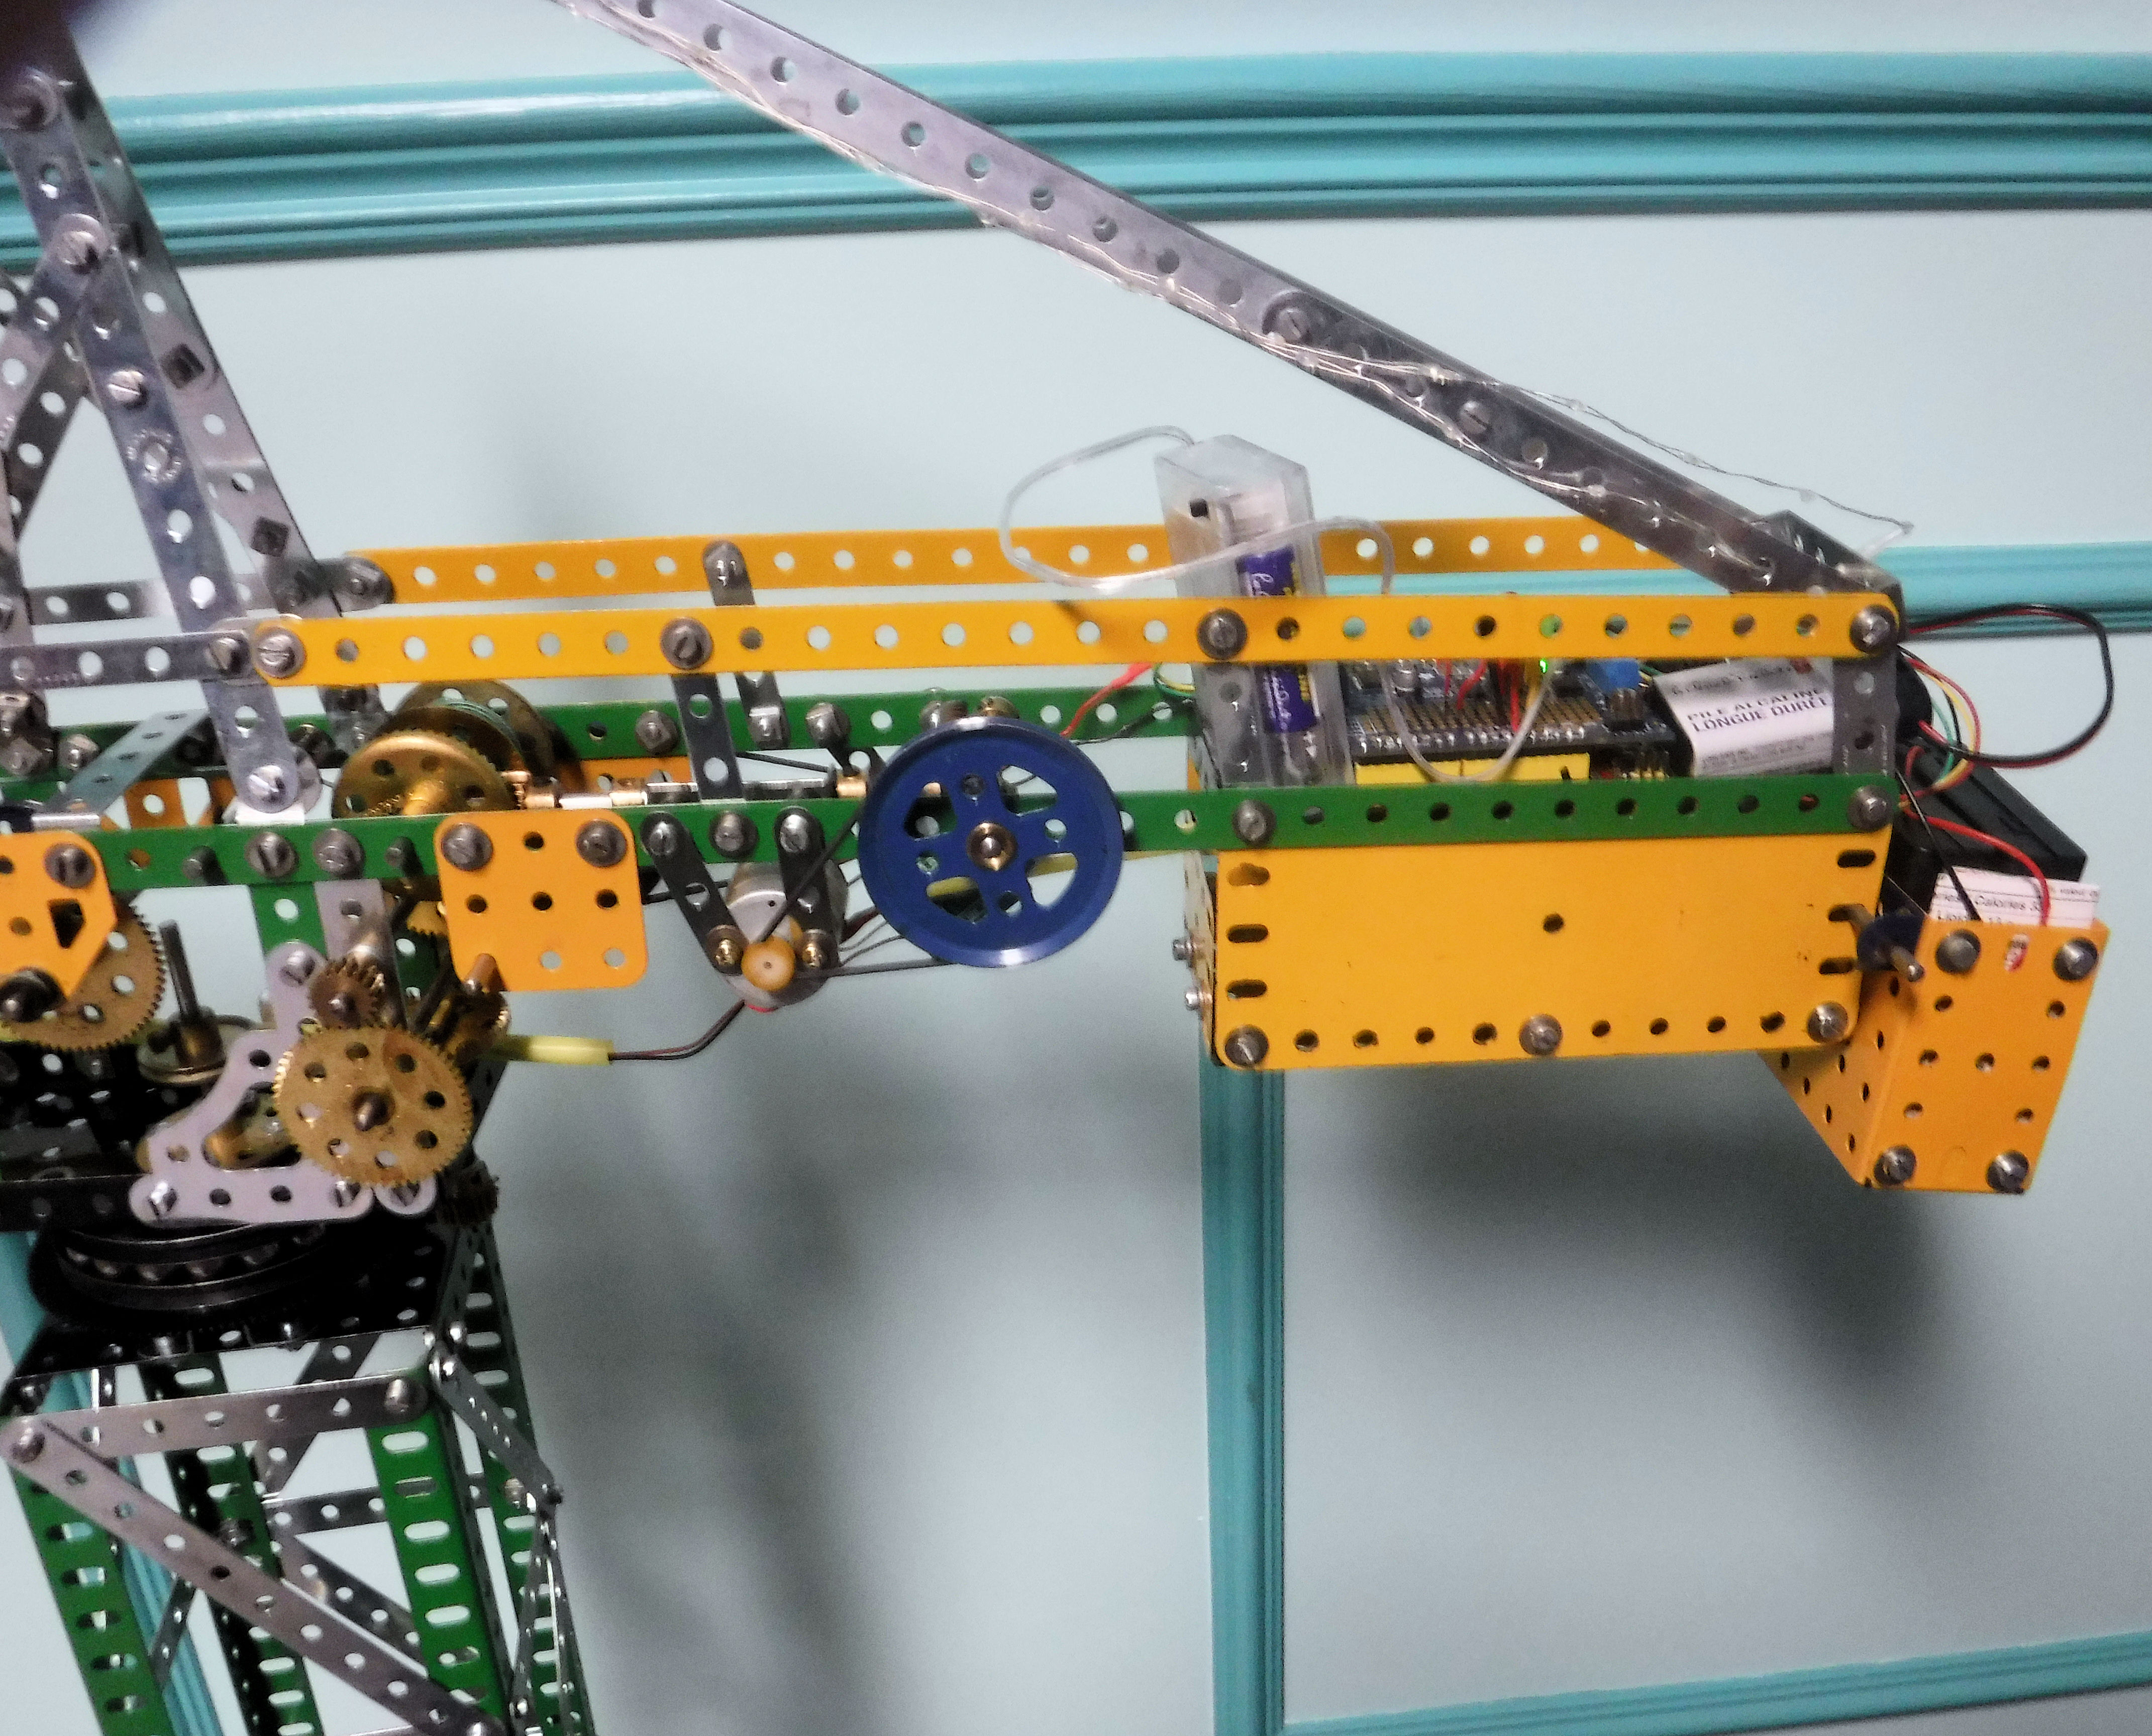
The counterweight is built using two 5 1/2 x 2 1/2" Flanged Plates separated by two 5 1/2 x 2 1/2" Flexible Plates; a small plastic bag of lead counterweights the jib.
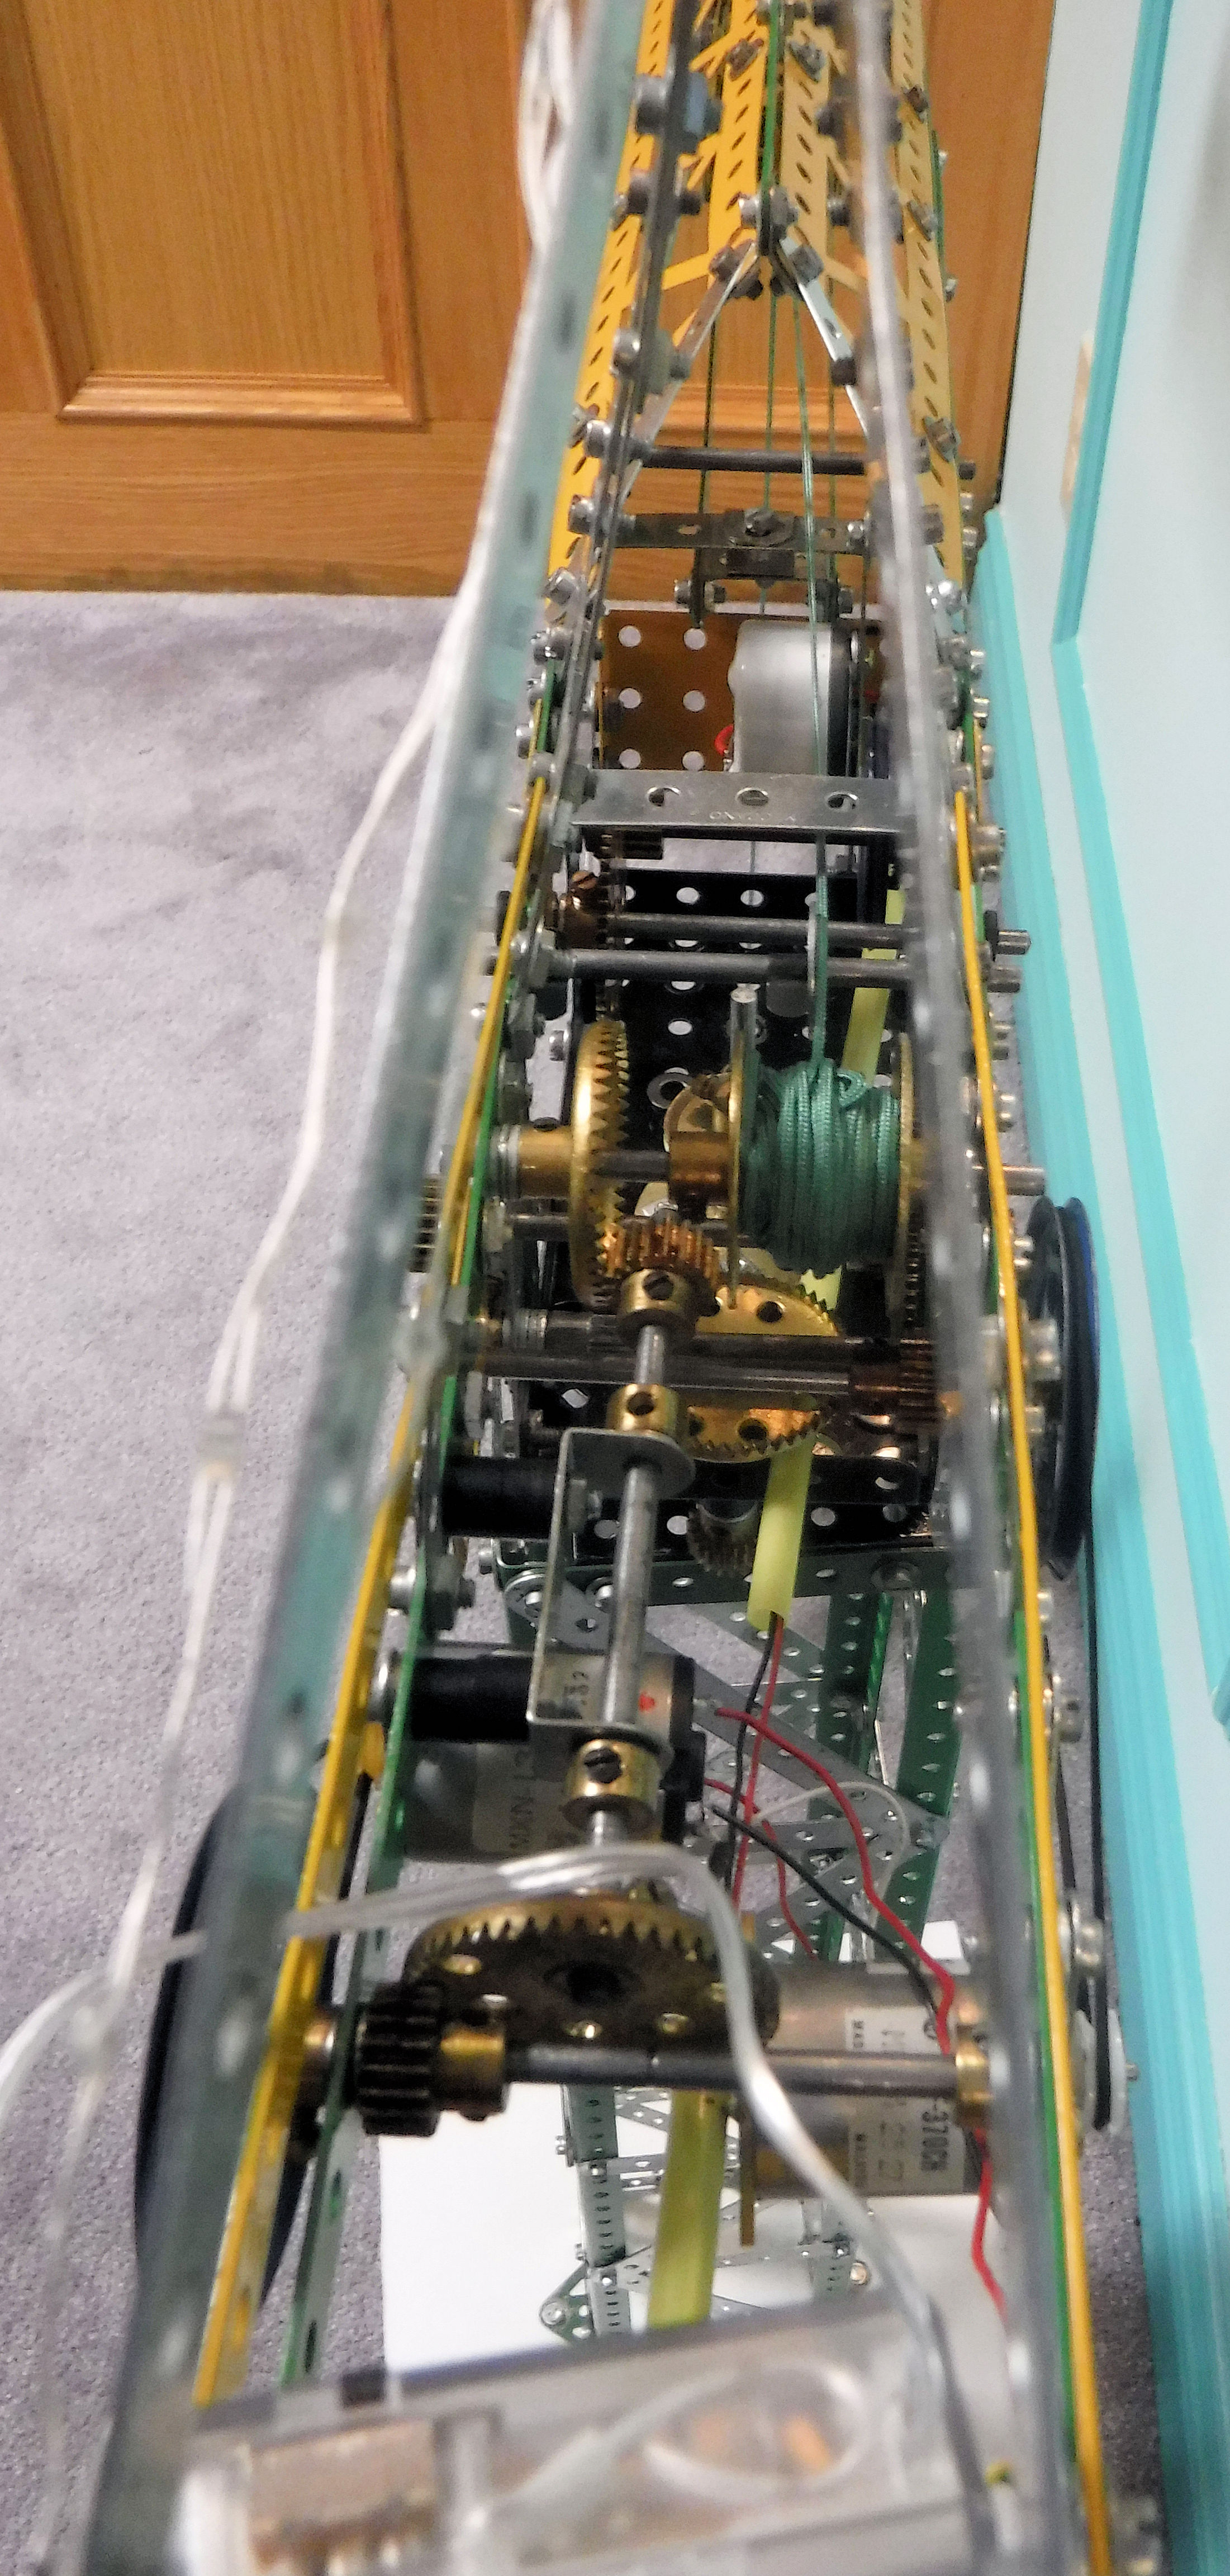
I'm using 3 random salvaged DC motors all of which are geared down for maximum power.
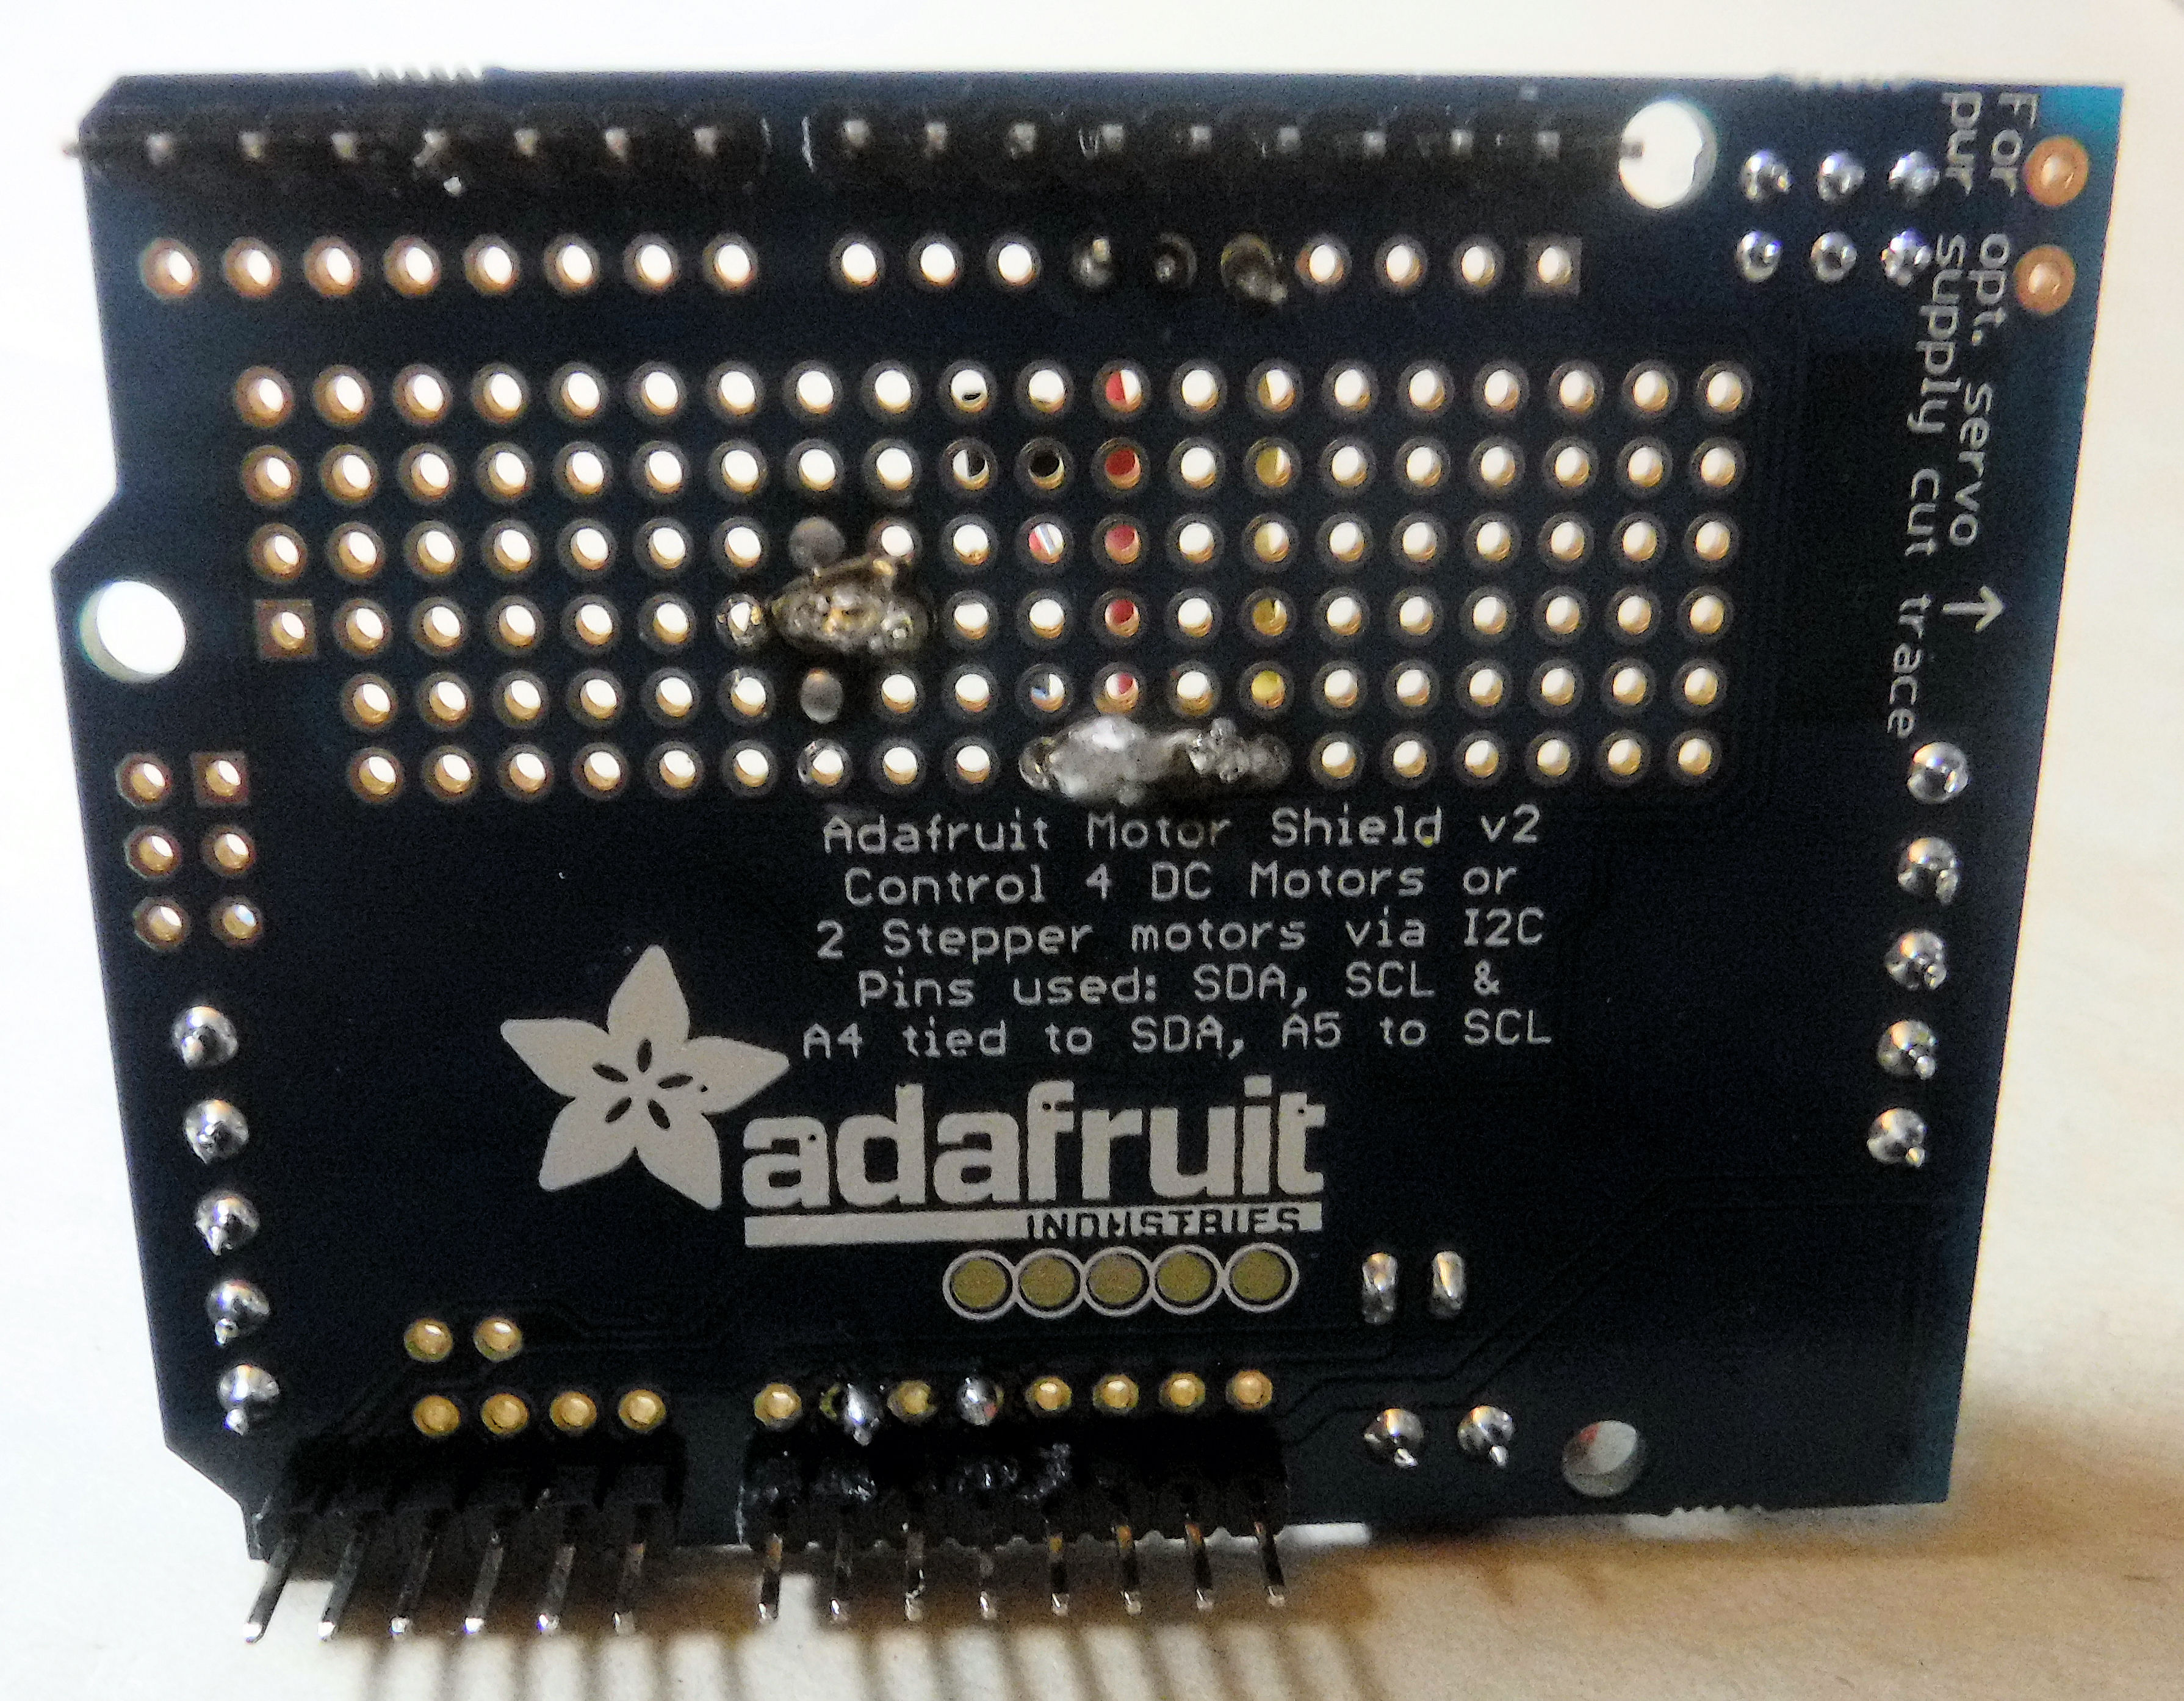
Adafruit Motor Shield (bottom) - see my clumsy solder bridge. The top solder bridge (2 holes) is connected to 5V by the blue wire; the bottom solder bridge (4 holes) is connected to ground (GND) via the red wire.
In the Meccano tradition of reusability, I'd have preferred to not have soldered parts directly to either the Arduino or motor shield but this can be difficult to avoid. One possibility is to use a "Prototype Shield" or "Screw Shield" (to be explored further). To add another shield onto the motor shield you must ensure that you use "stacking headers" rather than "standard headers".
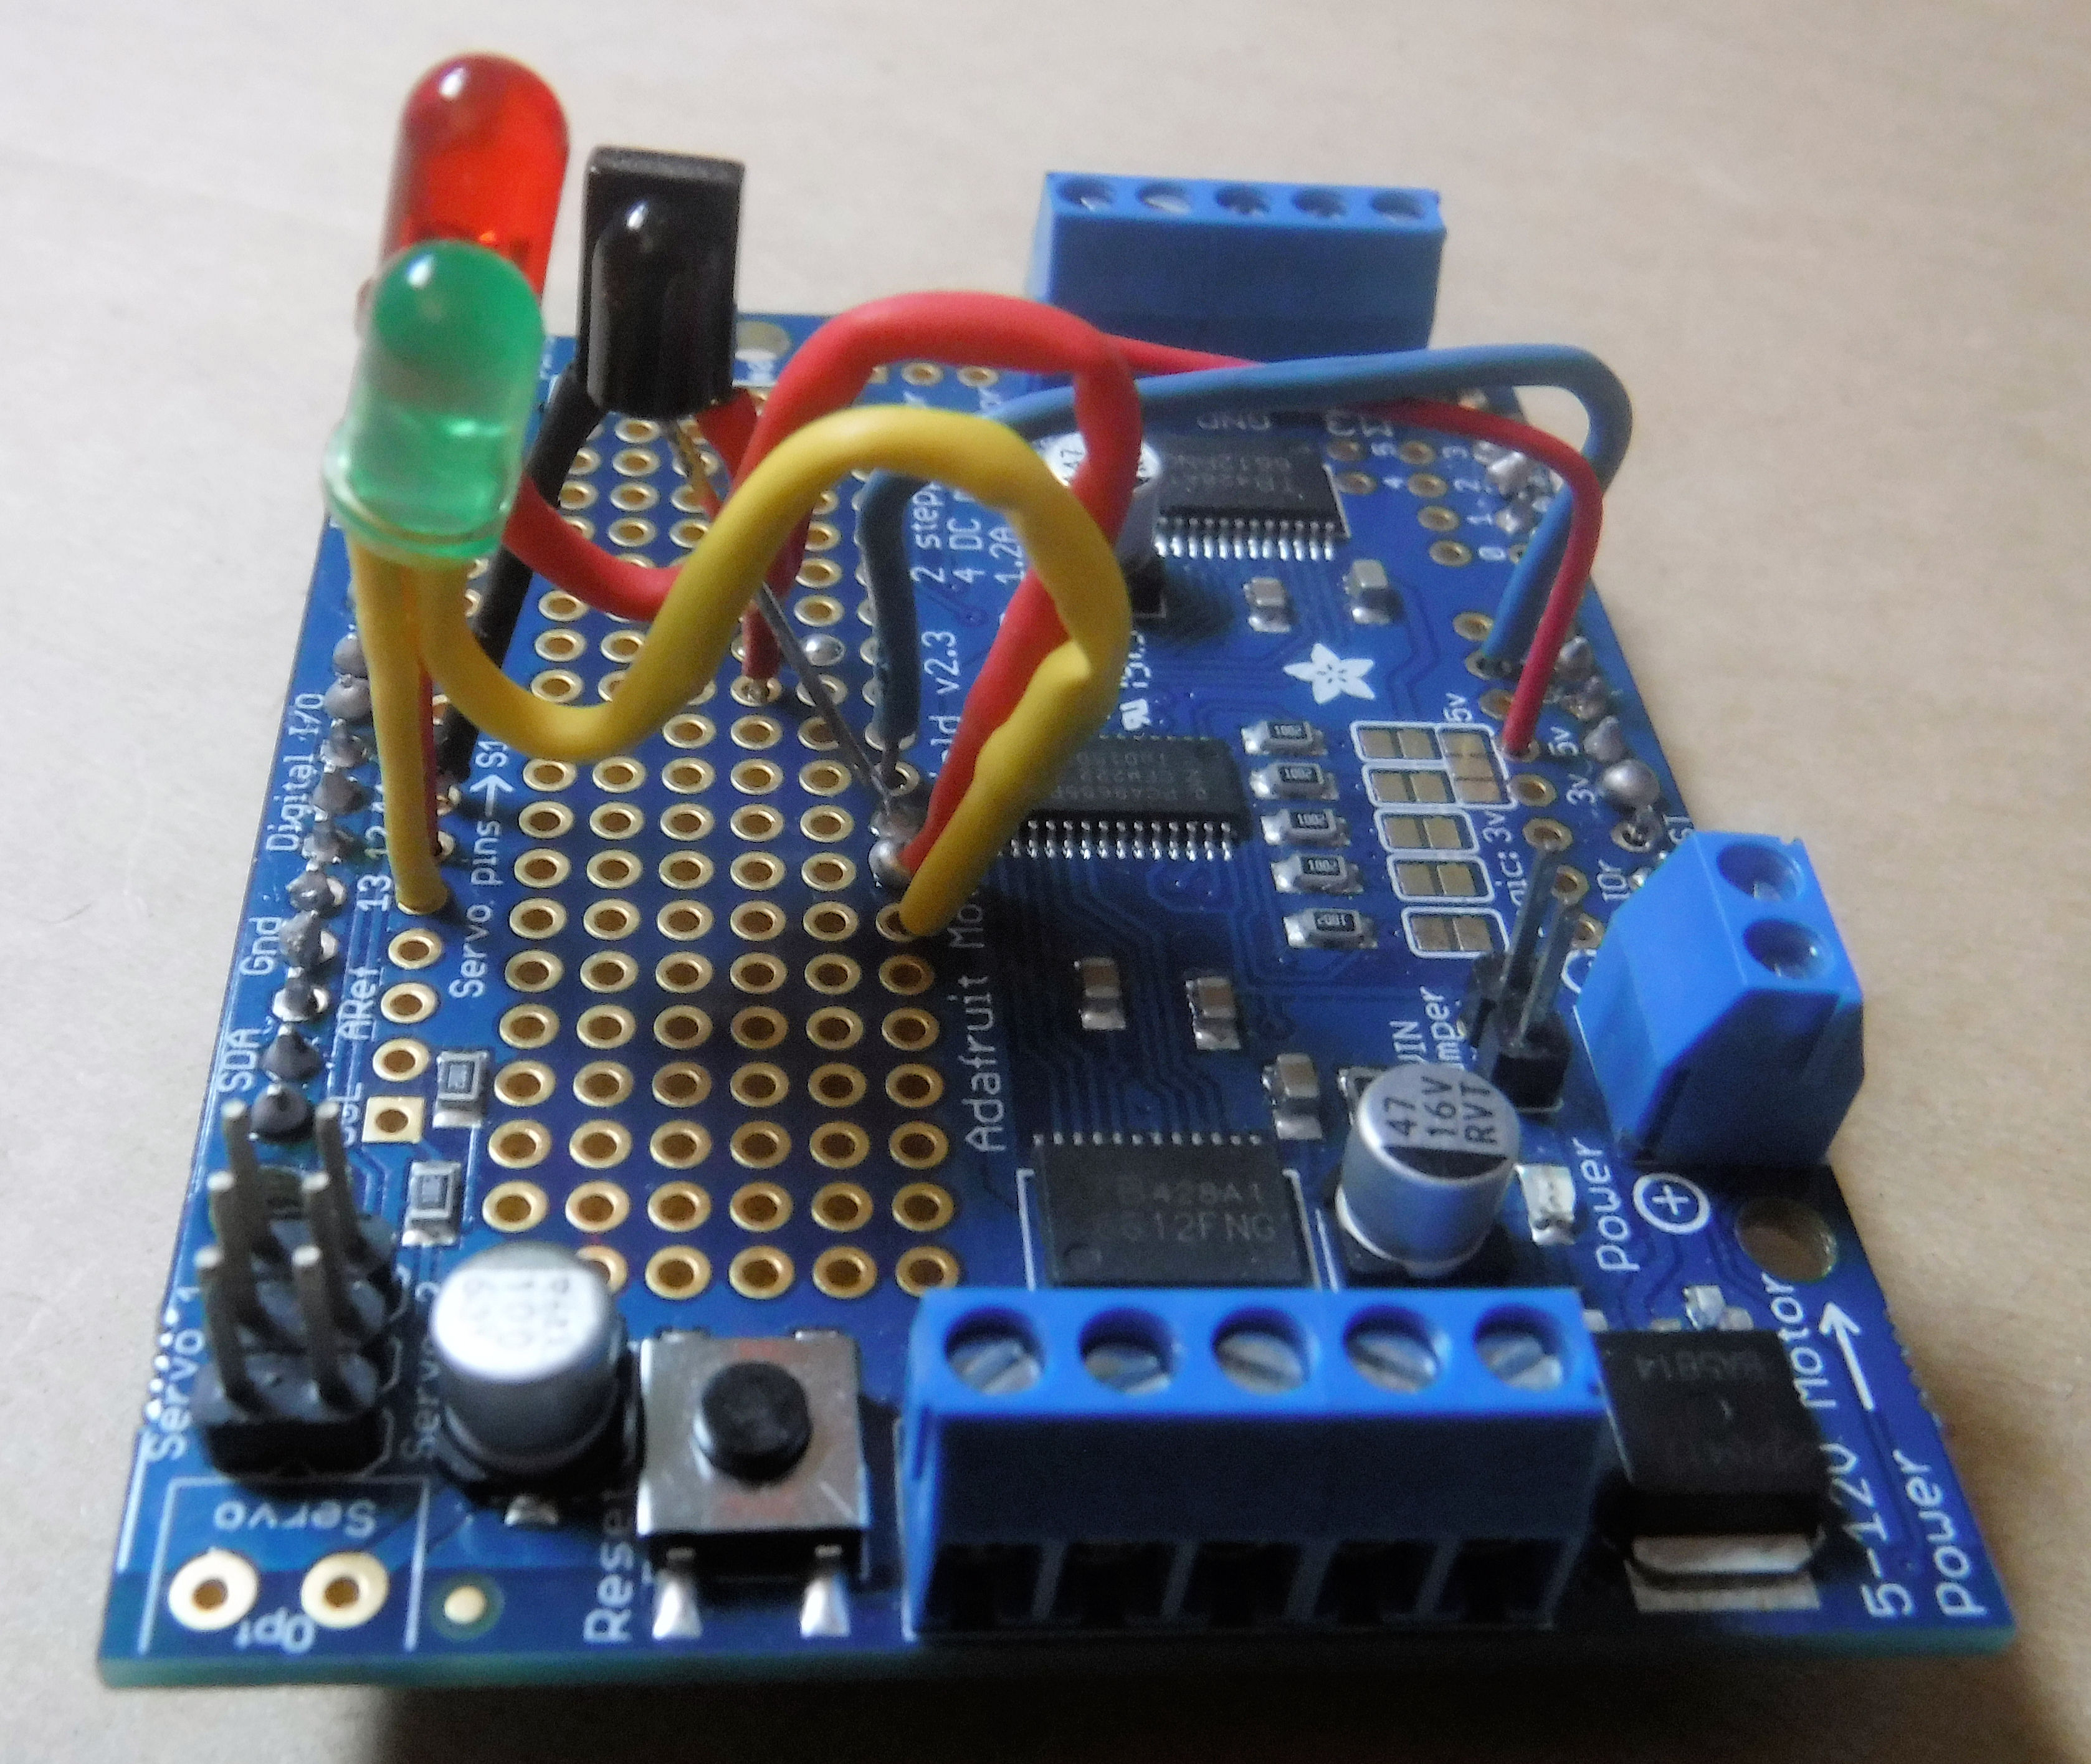
Adafruit Motor Shield (top) - soldered onto the board are a green LED with resistor, red LED with resistor and IR Receiver TSOP38238.
The red LED (red insulation) is connected to D12 (longer lead) and GND via a 560 Ohm resistor (shorter lead). The green LED (yellow insulation) is connected to D13 (longer lead) and GND via a 560 Ohm resistor (shorter lead). If LEDs are connected backwards they won't light up!
The IR Receiver TSOP38238 is wired as follows: pin 1 on left to D11, pin 2 in centre to GND & pin 3 on right to 5V. Power to each digital pin (D11, D12 & D13) is controlled by Arduino programming.
The motor shield plugs into the top of the Funduino Uno. The trolley motor is hooked up to screw terminal M1, the slew motor to M2 and the hook aka hoist motor to M3.
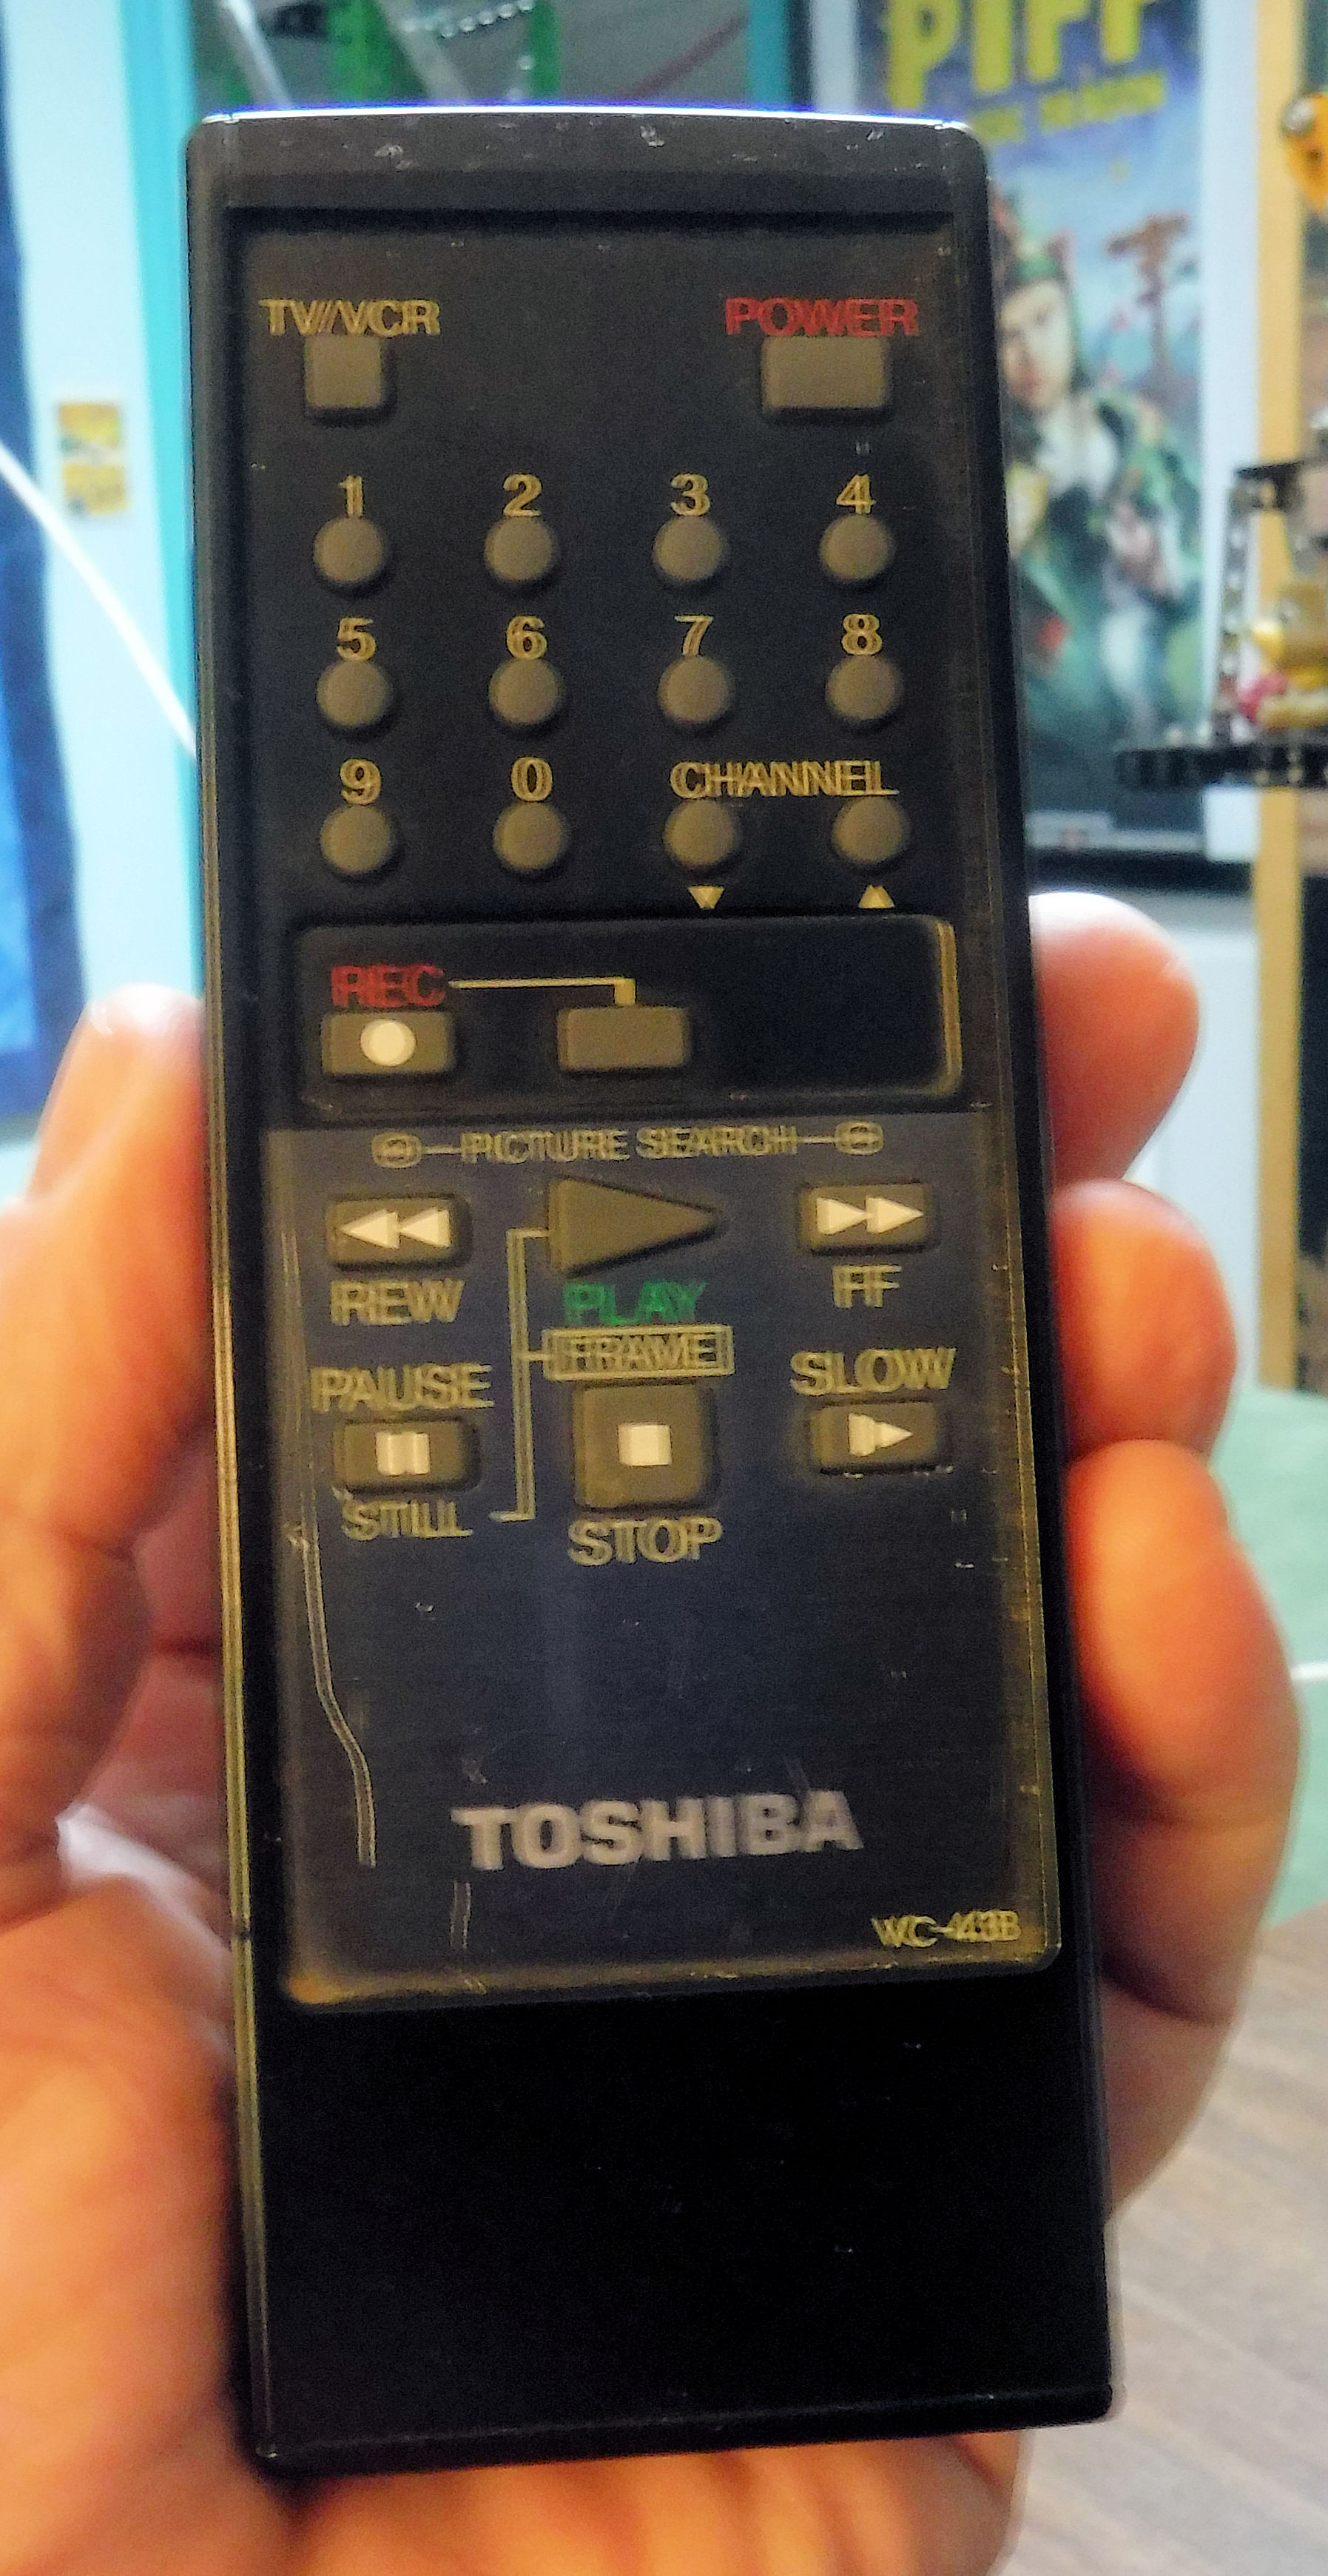
Old Toshiba VCR Remote Control (NECx protocol)
interacts with IR Receiver TSOP38238 to control Tower Crane functions:
1 - Trolley Forward
2 - Trolley Backward
3 - Hook Down
4 - Hook Up
5 - Slew Clockwise
6 - Slew Counterclockwise
7 - Record IR
8 - Playback IR
The Funduino Uno is programmed using C++ in combination with the Adafruit Motor Shield library and the IRLib2 library that supports any Infrared remote control protocol. This library lets you use almost any IR remote control.
The original program author was Wayne Hortensius of Calgary, Canada; I modified his program to work with my IR Receiver TSOP38238 in place of his Sure Electronics Infrared Remote Decoder Module. Many thanks to Wayne for sharing his program source code! As this was my first Arduino project, his assistance was invaluable. Wayne's Tower Crane (archived) is pictured here:
https://web.archive.org/web/20220116195520/http://nzmeccano.com/image-96533
The computer program logic decides what to do when any key on the remote control is pressed. Wayne's program includes support for Bittybot Proxdots (tiny proximity sensors) which detect when the trolley approaches either end of the jib and automatically cuts power to the trolley motor. These require the ability to solder tiny components. They've been "sold out" lately so I didn't use them.
My Tower Crane has a green LED light string draped over the top support strips to warn away high flying objects.
To power this model there are currently 3 power sources:
• two 4xAA battery boxes connected in series
to power the DC motors via the motor shield
• 9V battery to power the Arduino Uno
• the 3xAA battery box for the LED light string
(speculation on my part but maybe you
could eliminate this by wiring the light string to the 4xAA battery boxes
via the motor shield unused terminals M4; then you could turn it off/on via
the remote control with additional programming; however since I wired
the larger battery boxes in series the voltage might be too high)
This model requires no external wiring so the jib can slew 360 degrees. You need to connect it to your computer via USB only when you desire to change the Arduino program code. This program code is stored in non-volatile memory; no permanent power source is required.
For controlling Meccano models, the "AdaFruit Motor Shield V2" is the best overall especially as it comes with a C++ library (Adafruit_Motor_Shield_V2_Library) that makes programming much easier. It can control four DC motors or two stepper motors. Via programming you can control the motor direction and speed.
However if you need to control higher amperage motors then the "30A High Current Dual Motor Module Full-bridge Driver" or the "SparkFun Monster Moto Shield" are available but the programming interface is totally different. It can control two DC motors simultaneously.
For on/off control of any electrical appliance, you'd use a "relay". You can purchase inexpensive relay boards with pre-soldered components that are designed to interconnect with an Arduino microcomputer.
See also Arduino Computer Control of Meccano Models for background material.
  _________________________________________________________
 (_O__O__O__O__O__O__O__O__MECCANO__O__O__O__O__O__O__O__O_)

Copyright 2016-2026 by David Williams.